Isomag Bearing Isolator Installation and Removal Procedure
Isomag Bearing Isolator Installation Procedure:
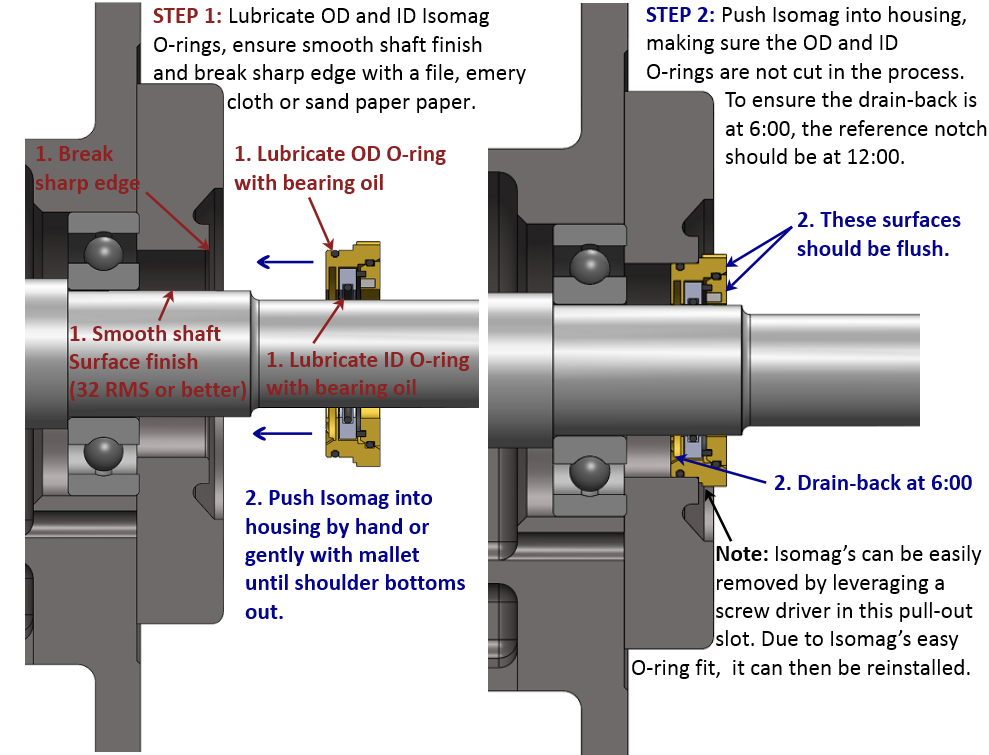
Inspect housing, shaft, and shaft keyway for any sharp edges, fret marks and defects. The shaft’s surface finish should be 32 RMS or better. Seals positioned over a fretted shaft will cause damage. (00:40 in video)
Break sharp edges with emory cloth or sand paper.
Lube the ID and OD O-rings on the Isomag with bearing oil. (01:20 in video)
Lube the equipment’s shaft and housing with bearing oil.
Carefully slide the seal on the shaft as to not cut the O-ring on the keyway while pushing equally on both sides towards the bearing housing. (01:45 in video)
Push the Isomag bearing isolator into the housing ensuring the notch is at 12:00. (02:21 in video)
Once installed in the housing, confirm that the seal is square and seated against the housing face.
Isomag Removal Procedure:
Remove motor-to-pump coupling.
Remove shaft key.
Drain bearing oil from equipment or isolate the mist system.
Using two flat head medium screw drivers, insert them under the designed lip of the Isomag seal flange and gently pry the seal back separating it from the housing. (3:25 in video)
*At this point, once the seal’s OD O-ring clears the housing, you are now free to make axial shaft adjustments. Simply make adjustments then reinstall the Isomag with the reference notch at 12:00. (4:00 in video)
5. Pull Isomag back gently over the shaft to complete the removal procedure.
For a PDF copy of ISOMAG's installation instructions click here to visit our downloads page
#Pump #Gearbox #ElectricMotor #SteamTurbine #Guide #BearingIsolator